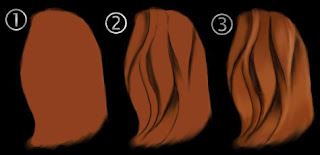
Step 2. Black lines are used to create a sense of streaming curl. The lines should be soft to look natural.
Step 3. From now I start adding more colors. With the help of warm hues I lighten up the curl. Then I start adding basic shadows.

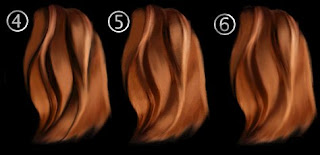
Step 4. I continue to work with the colors of the hair. There are a lot of different reflections, a myriad of different hues of the same color.
Step 5. To that moment I used only an airbrush tool and a hard brush. Now it is time to use tools with soft edges. So I choose the smudge tool and the soft brush of large size and start to blur the lines. As you can see on the picture, sometimes I mix up the hair in one heavy curl. Finally I remove the layer with the sketch that was made in the step #2.
Step 6. I blur the edges slowly making them soft. Then I begin to create "streaming flow" of hair with the help of transition colors.

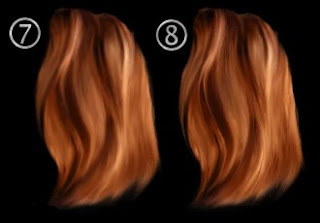
Step 7. I am working with the structure of hair. To get rid of feeling of heavy and unnatural hair, I take a soft brush and airbrush tool and start drawing soft, but quite large lines passing through the curls. Before drawing the line I take an eyedropper tool and take the color from the curl.
Step 8. Using the smudge tool I stretch the lines that were drawn in the step #7. Then I use the airbrush tool to make more accurate change in colors.

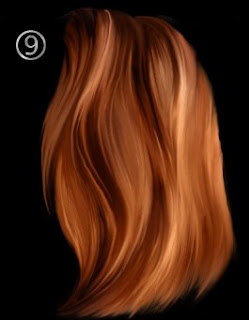
Step 9. Finally, I check whether separate curls are visible. Using smudge brush with the small size, I work with the almost every separate hair to create a feeling of realistic hair.
